Posts tagged #dutch oven

Campfire Sausage Stew with Thyme Dumplings

Sausage Stew and Dumplings

Sausage Stew and Dumplings

Stew is one of my staple outdoor dishes; it's very hard to mess up and the results can be spectacular. This time however, I wanted to up the stew ante and nudge my culinary comfort zone a little further by taking on the mighty dumpling.

Ingredients

For the stew

  • 6 Really good sausages (I normally go for something herby and porky, preferably from a good butcher)
  • 2 Large white onions, roughly chopped
  • 2 Large carrots, sliced
  • 10 Small new potatoes, chopped in half
  • 1 Pint of stock (I used a couple of beef stock cubes)
  • 1 Can of cheap beer
  • 1 Bottle of expensive cider
  • Worchester sauce
  • Thyme
  • Oil for cooking (something with a high burning temperature, sunflower is fine)

For the dumplings

  • 1 Cup of self raising flour
  • 1 Egg
  • 50g Cold butter cubed
  • 1 Tbsp chopped parsley
  • 1 Tbsp chopped thyme
  • ¼ Cup of milk

Method

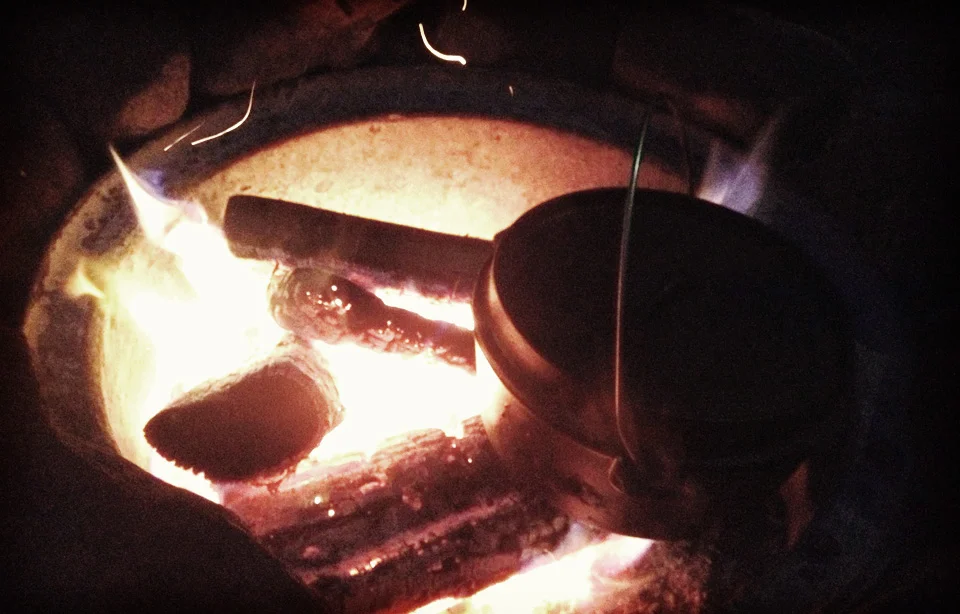
I cooked my stew on a campfire in a suspended Dutch oven, it needs to cook for several hours so make sure there are sufficient coals. I started with a big hot fire with slow burning wood and let it burn down. You can, of course vary the height of the oven and even cover it in coals if the heat is needed.

Sautéing and Grilling

Sautéing and Grilling

1. Lightly heat the Dutch oven and add the oil. Sauté the onions, do not let them brown - they should soften and go translucent.

2. While the onions were cooking, I put the sausages on a rack directly over the flames to seal and brown the outside. They don't need to cook through as this will happen later. I managed to tilt the grill in such a way that the oil and juices went into the Dutch oven for extra flavour.

3. Once the sausages are browned add them to the onions and pour in the stock, beer and cider. I added a good spoonful of thyme and a few good glugs of Worchester Sauce. Give it all a good stir and bring the oven to the boil, cover and simmer for 45 minutes.

4. By now the broth should be coming together nicely and slowly reducing. Add the vegetables and return the stew to the heat, give it a good stir and cover, then cook for another 30 minutes. Mix up the dumplings.

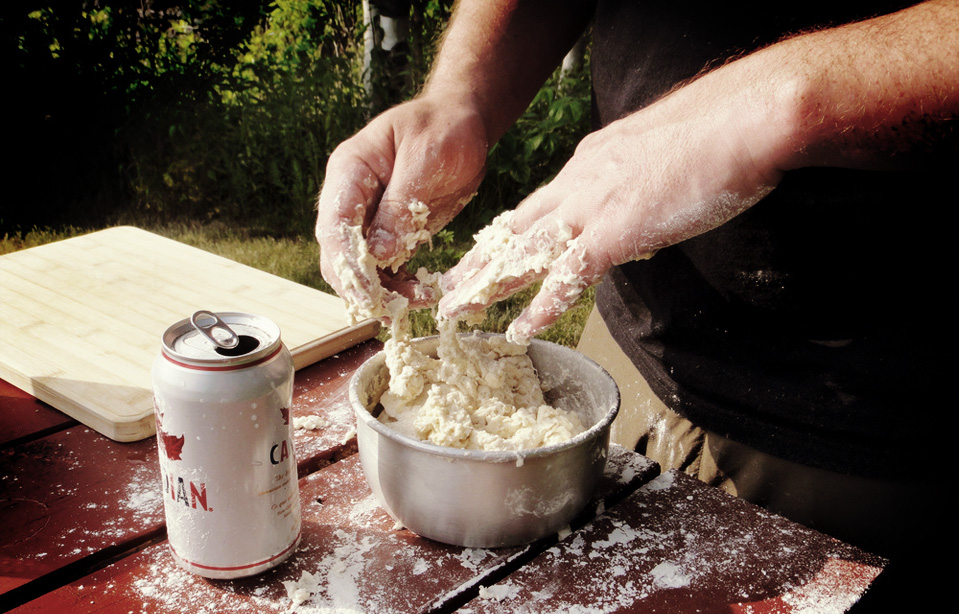
5. To make the dumplings, pour the flour into a large bowl, add the butter and rub it in until it resembles breadcrumbs.

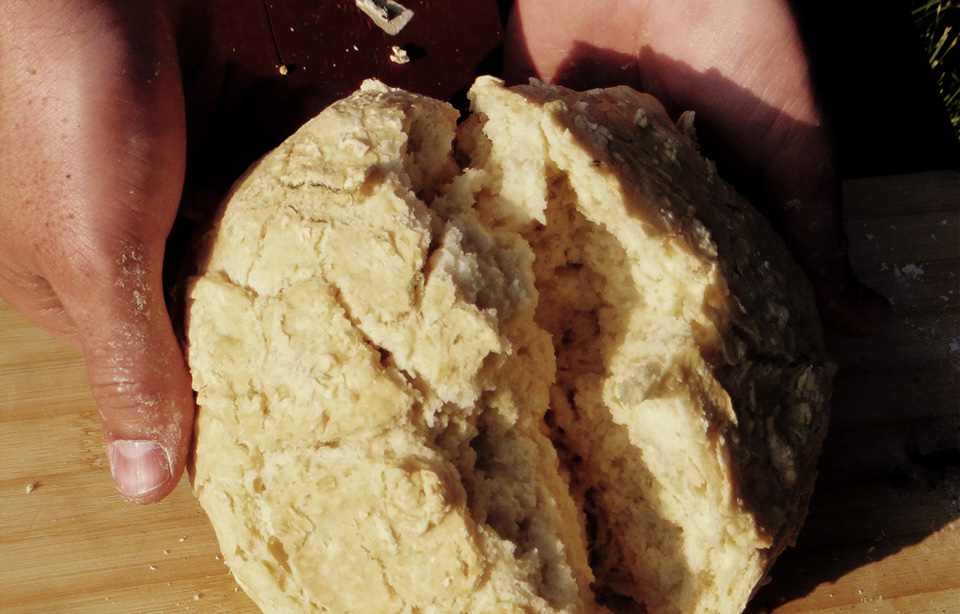
6. Add the herbs and the egg, and mix with your hand, adding just enough milk so that the mixture comes together in a sticky dough.

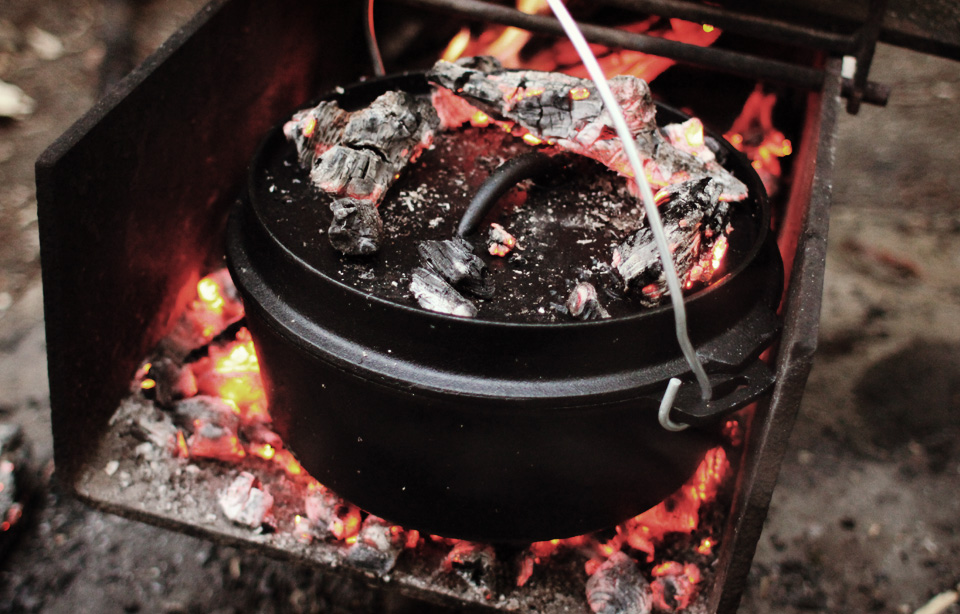
7. Check the stew, it should have reduced considerably making a thick, rich gravy; if it is too dry add a little water or stock. Give it another stir and then add large spoonfuls of the dough directly onto the top of the stew. Try and place them a few centimeters apart as they will puff up as they cook. Replace the lid on and cook for another 15 minutes.

8. Check the stew. The dumplings should have puffed up and increased in size and the stew should be thick and rich. I prefer the top of my dumplings to be crispy so I buried the Dutch oven in coals and  blasted it for another five minutes.

9. Then it is done. Serve quickly and eat heartily.

Stew and Dumplings Finished and Ready to Serve

Stew and Dumplings Finished and Ready to Serve

The stew is hefty and flavorsome, the dumplings sticky, doughy and morish. Shared between two we were both stuffed and had enough for lunch the day after. I'm not sure why I was so fearful of campfire dumplings, they were foolproof and a simple way of getting a delicious and filling bread course to my stew, with little effort.

Posted on July 6, 2014 and filed under Recipe.

Campfire Curry

Campfire Curry

Campfire Curry

This is my second attempt at documenting my campfire cookery. The dish is a little ambitious but worth the effort as there is nothing better than curry made from scratch. This particular recipe is loosely based on Pat Chapman's pragmatically named, yet delicious – "Medium Curry, Restaurant Style"  from "The Indian Restaurant Cookbook," published in 1984. Chapman is, in my opinion, one of the leading authors of Indian cookbooks and a champion of the English restaurant style of curry.

Finished Curry

Finished Curry

Campfire Curry, Restaurant Style

The beauty of this dish is that all of the more complicated components can be made in advance; the spices can be mixed and a simple onion purée can be made at home before you head out to camp.

Onion Purée

Roughly chop 10 onions, 20 large garlic cloves and 100g of fresh ginger and lightly fry in 300ml of vegetable oil over a light heat. This should take about 15 minutes; they should turn translucent but not brown. Purée the fried mixture and let cool, then fry for another 15 minutes with another 300ml of vegetable oil. This will make 10 cups of purée, which can be frozen for future curries.

Ingredients

1.4 kg skinned chicken cut into 3cm cubes (not just breast, make sure to use some thighs for more flavor) 2 cups of onion purée, brought from home (see above) 2 tbsp. tomato purée

Spices 1, mix this at home 2 tsp. ground cumin 2 tsp. ground coriander 2 tsp. turmeric 2 tsp. chilli powder (or more depending on how hot you like it) 2 tsp. ground ginger 2 tsp. garlic powder

2 tsp. garam masala

Method

This is a baked curry so you will need a Dutch oven and a good bed of coals for a long slow cook. Build the fire big and hot and let it burn down to good cooking coals.

  1. Heat your Dutch oven to medium hot, add onion purée and fry until it is hot, add extra oil if you think it is sticking
  2. While the onion is frying mix a little water with spice mix 1 to make a paste
  3. Add this paste to the heated onions and give it a vigorous stir, making sure it doesn't stick, take it off the heat if it's getting too hot. Cook for a good five minutes - the goal is to remove all the water from the spices
  4. Add the chicken and the tomato and mix really well coating all the chicken
  5. Put on the Dutch oven lid and bake for 45 minutes at a medium heat (375°F, 190°C). I cannot help giving it a look every 15 minutes but if you feel you have the heat just right then leave it longer. This should be a dry-ish curry but if you feel it is going to burn add a little water.
  6. After 45 minutes add the garam masala and cook for another 10 minutes
  7. Serve with rice and flat breads.

The curry was spicy and rich, with tender chunks of chicken and enough sauce to mix with the rice. I've tried this dish at home with lamb, which was delicious, but the fire smoke and the outdoor surroundings certainly added new level of flavour to the curry.

The "The Indian Restaurant Cookbook" appears to be out of print now. It's not too hard to come by a second hand copy and is worth snapping up if you find it.

Posted on June 5, 2013 and filed under Recipe.

Tips from the Archive #004

Dutch Oven Cooking Temperature

Dutch Oven Cooking Temperature

This one is a goody,  especially for the outdoor gourmet. It comes from Viv Moon's Outdoor cookbook. This is my go-to outdoor cookery guide. This particular tip is great for anyone trying to master the dutch oven.

Tip 004 – Dutch Oven Temperature

There are various methods around that some camp cooks use to judge how hot the camp oven is, the old, but tried paper testing method being a fairly good gauge.

Paper Test–put a piece of paper such as brown paper bag (not newspaper) inside your preheated camp oven. Within a few minutes it turns:

Dark brown–oven is very hot 240-300˚C [465-570˚F]
Light brown–oven is hot 220-230˚C [425-440˚F]
Yellow–oven is moderate 180-190˚C [355-375˚F]
Pale–oven is slow 120˚C [250˚F]
— Viv Moon - Viv Moon's Outdoor Cookbook, 2002

Hope this helps.

Posted on August 25, 2012 and filed under Tips from the Archive.

Damper

Damper

Damper

Damper is an iconic Australian bush bread - a staple for stockmen, swagmen, drovers and indigenous Australians alike. It is similar to bannock but is traditionally cooked directly on campfire coals or in a Dutch oven. The recipe is simply water and self raising flour, but everyone seems to have their own unique spin. The recipe I followed is from Viv Moon's incredible "Outdoor Cookbook"

Basic damper recipe

3 ⅓ cups self raising flour
Pinch of Salf
Beer (any kind)
Place flour into a mixing bowl and make a well in the centre

Add any other ingredients you wish to add. Mix in enough beer to form a soft pliable dough. This is usually more easily done with hands rather than spoons. If the mixture feels too moist, sprinkle over more flour. If too dry simple add more liquid.

Do not overwork the mixture as it will become tough

Roll into a ball shape that will fit into your camp oven. The camp oven can be lined with foil to protect the base, if desired.

Place in a moderate preheated camp oven and bake for at least 20 minutes before checking
— Viv Moon - Outdoor Cookbook
Mixing the Dough

Mixing the Dough

This was very simple and very tasty, I followed Viv's recipe to the note. I used a trivet in my oven just to lift the bread a little and get the heat circulating. As ever with a Dutch oven it took a while to get the really good coals ready but it can't be rushed. I preheated the oven and dropped the dough in, checking after 20 minutes - the bread had risen nicely and giving it a tap I got the tell-tale hollow sound. I added more coals and increased the heat to try and get a little more colour and gave it another ten minutes.

The Finished Product

The Finished Product

The results were great. It seemed to rise more than bannock but didn't quite get the colour of the skillet bread. Taste wise it was light, fluffy and delicious. We ate it with campfire chilli and had enough left for breakfast the next day. I will definitely be making this again.

Head to head against bannock I preferred damper; although it tasted similar it was a much lighter bread. It does however take longer to cook and requires a camp oven not just a frying pan or skillet.

If any body else has tried damper or has their own spin on it I'd love to hear about it.

Posted on July 4, 2012 and filed under Recipe.